
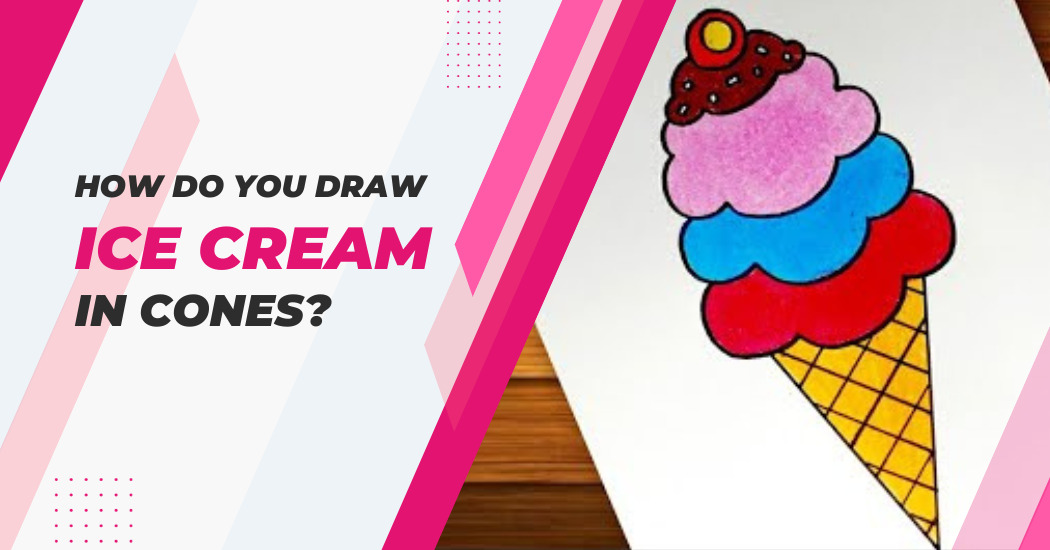
How Do You Draw Ice Cream Cone?
Do you love eating ice cream but want to delve deeper into the process of creating this delicious and creamy treat? Good news you can learn how to draw ice cream in a cone! Drawing your creation is a satisfying way to explore art, as well as see beautiful results.
In this blog post, we’ll break down the tips and steps you need to draw a delicious-looking scoop of ice cream within its cone.
Get inspired as you master angles, shading nuances, techniques for creating waffle texture and more it’s time to get creative with yummy frozen treats!
How Do You Draw Ice Cream In Cone?
Materials needed to draw ice cream in a cone
To embark on this fun, artistic journey, you’ll need a few basic materials.
- A pencil: This is a must-have for any drawing endeavor. It can be a standard No. 2 pencil or a set of drawing pencils if you want a range of hardness for different shades and lines.
- An eraser: Everyone makes mistakes and that’s where your trusted eraser comes in handy!
- A sharpener: Keeping your pencil sharp is important to maintain those crisp lines and details.
- Paper: This will be your canvas. You can use any paper but a sketchbook with heavier-weight paper can help if you plan to add color later.
- Colored pencils or markers (optional): If you want to add a pop of color to your ice cream cone, have some colored pencils or markers at the ready.
- A ruler (optional): This will assist in keeping lines straight and proportions accurate if needed.
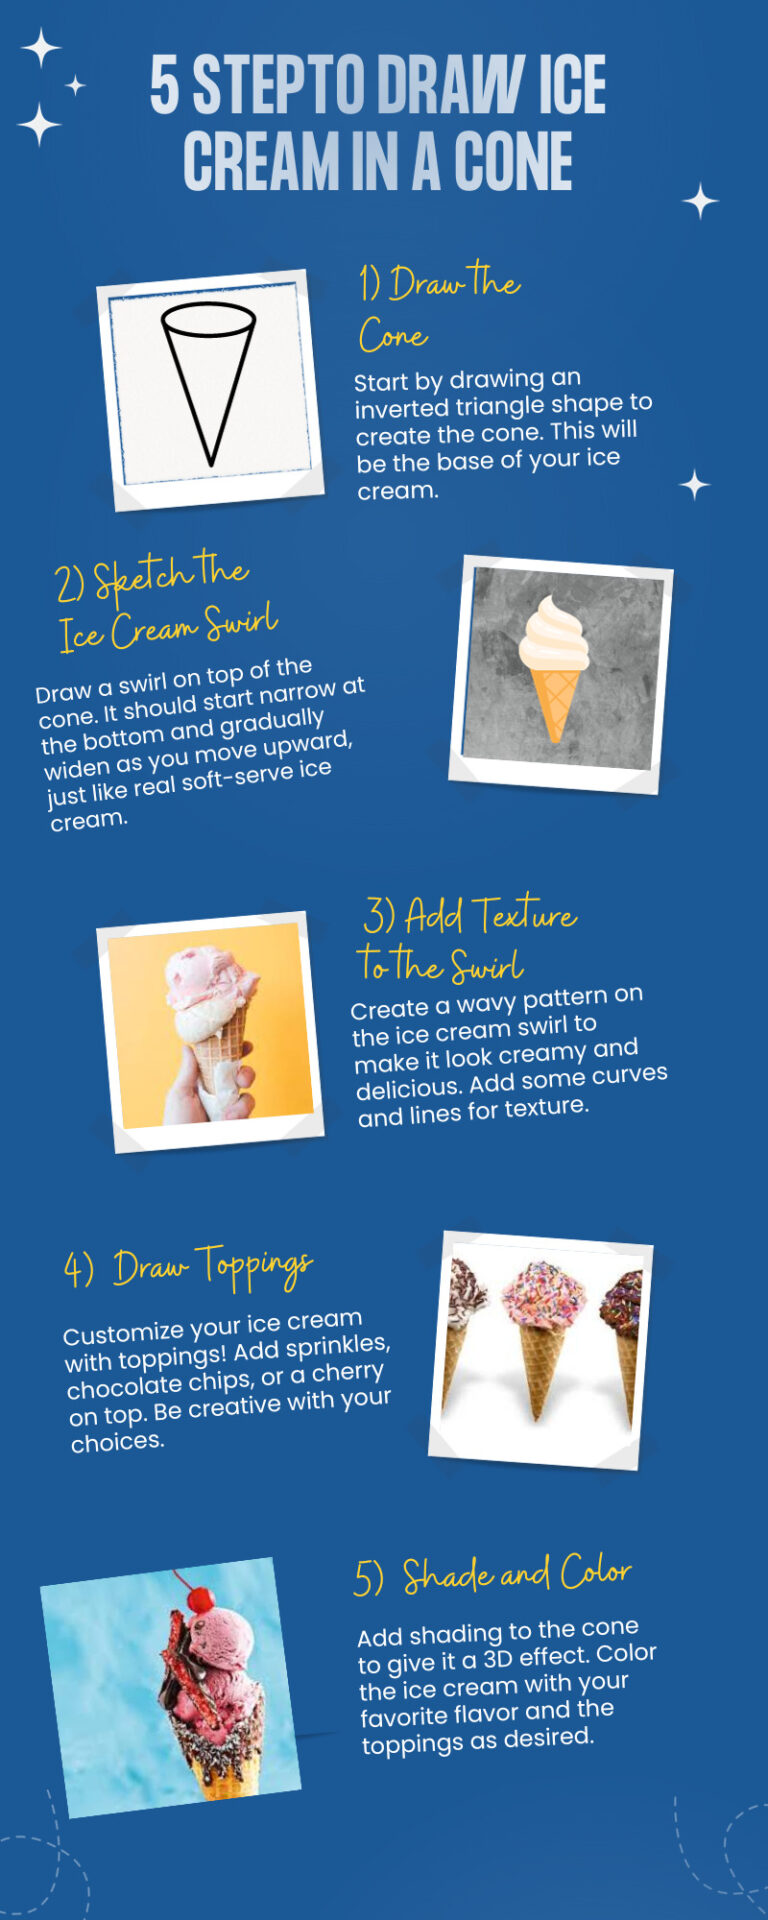
Steps to Draw Ice Cream Cone
Follow these steps to bring your ice cream cone to life:
- Shape the cone: Start by drawing a V shape for the cone. The top of the V will be the bottom point of the cone.
- Add the ice cream: Draw a circular shape or an oval at the top of the cone to represent the first scoop of ice cream. If you want to add more scoops, repeat this step.
- Details of the cone: Draw diagonal lines from top to bottom on one side of the cone, then repeat on the other side, creating a crosshatch pattern. This gives the effect of a waffle cone.
- The texture of the ice cream: Add curved lines on the ice cream scoop to create the illusion of its creamy texture.
- Add the drips: Ice cream melts! Add a few dripping lines coming from the bottom of the scoop to make it look realistic.
- Adding toppings: For a fun twist, consider adding toppings to your ice cream. Whether it’s sprinkles, a cherry, or a drizzle of sauce, this step can help make your drawing even more delicious-looking.
- Draw sleeve (optional): To draw an ice cream cone sleeve, draw a small rectangle that is slightly larger than the top of the ice cream cone. The sleeve should overlap the cone at the top and bottom. Add some folds and wrinkles to the sleeve to make it look more realistic. You can do this by drawing light, curved lines.
- Final touches: Take your eraser and clean up any lines you don’t need. Now, you can add color to your drawing. Use different shades for the cone and ice cream to make it look more appealing.
Tips and tricks to draw ice cream in a cone
Drawing ice cream in a cone can be a fun and rewarding activity but like any other art form, it can be tricky to get it just right.
Here are some tips and tricks to help you perfect your ice cream cone drawing:
- Shading: To make your ice cream look more realistic, consider using shading. Lightly shade the side of the scoop to create a sense of depth and volume.
- Work on Proportions: Practice getting the proportions of the cone and the scoops right. A common mistake is to draw the ice cream scoops too small or the cone too long. Remember, the size of the scoops should ideally be equal to or larger than the cone itself.
- Perspective: Consider the perspective of your drawing. If you want to draw a cone held up, the top of the cone should be wider than the bottom.
- Texture: For the texture of the ice cream, avoid drawing solid lines. Instead, use light, curved strokes to imply the creamy texture of the ice cream.
- Experiment with colors: If you’re coloring your drawing, experiment with different shades. For instance, if you’re drawing chocolate ice cream, use dark brown for the base and lighter brown for the highlights.
- Practice: Lastly, remember that practice makes perfect. Don’t be disheartened if your first few attempts don’t turn out as you expected. The more you sketch, the better you’ll get!
Let these tips guide you as you navigate your artistic journey. Above all, remember to have fun and let your creativity shine!
Mistakes to avoid drawing ice cream in a cone
While drawing ice cream in a cone can be an enjoyable experience, there are some common mistakes that you should avoid to ensure your drawing looks realistic and appealing.
Here are a few things to keep in mind while creating your masterpiece:
- Avoid harsh lines: Ice cream is soft and creamy. It’s essential to use light, curved lines to give the illusion of texture and consistency. Harsh, straight lines can make your ice cream look stiff and unnatural.
- Don’t overdo details: Adding too many details can clutter your drawing and make it look messy. Keep it simple, especially if you’re a beginner.
- Be mindful of the cone shape: The bottom of the cone should be narrower than the top. Avoid making the cone too wide or too long.
- Don’t forget to shade: Shading is crucial to make your drawing look more realistic and three-dimensional.
- Avoid unnecessary lines: Clean up any extra lines with an eraser to keep your drawing neat and clean.
FAQs – Draw Ice Cream Cone
How do I start drawing an ice cream cone?
Begin by drawing a V shape for the cone and add a circular or oval shape at the top for the ice cream scoop.
How can I make the cone look more realistic?
Draw diagonal lines from top to bottom on both sides of the cone to create a crosshatch pattern which gives the effect of a waffle cone.
How do I add texture to the ice cream scoop?
To add texture to an ice cream scoop, consider using toppings such as crushed nuts, chocolate chips, sprinkles, or drizzling syrup. These elements can create both visual and tactile textures to enhance the ice cream experience.
Can I add toppings to the ice cream?
Absolutely! Whether it’s sprinkles, a cherry, or a drizzle of sauce, adding toppings can make your drawing look even more delicious.
What can I do to improve my ice cream drawing?
Practice shading to create a sense of depth and volume, work on getting the proportions right, consider the perspective of your drawing, and experiment with different shades if you’re coloring your drawing.
What are some common mistakes to avoid when drawing ice cream in a cone?
Avoid using harsh lines and overdoing details and be mindful of the cone shape. Also, remember to shade and clean up any extra lines with an eraser.
Final Words
Drawing an ice cream cone is an enjoyable artistic endeavor that requires a keen eye for detail, a sense of proportion, and a willingness to practice. It involves several steps, from sketching the basic shape of the cone and scoop to adding texture and shading to bring the drawing to life.
While there are common mistakes to avoid, it’s essential to remember that art is a personal journey and unique to every individual.
So, don’t be discouraged if your first few attempts aren’t perfect. Embrace the learning process and most importantly, have fun! After all, drawing should be as delightful as eating an ice cream cone.